Navigating the Bitfount Hub
The Bitfount Hub is the place where you can manage all of your Bitfount activity. When you log in to Bitfount, you are directed to the Hub dashboard from which you can navigate to perform several activities:
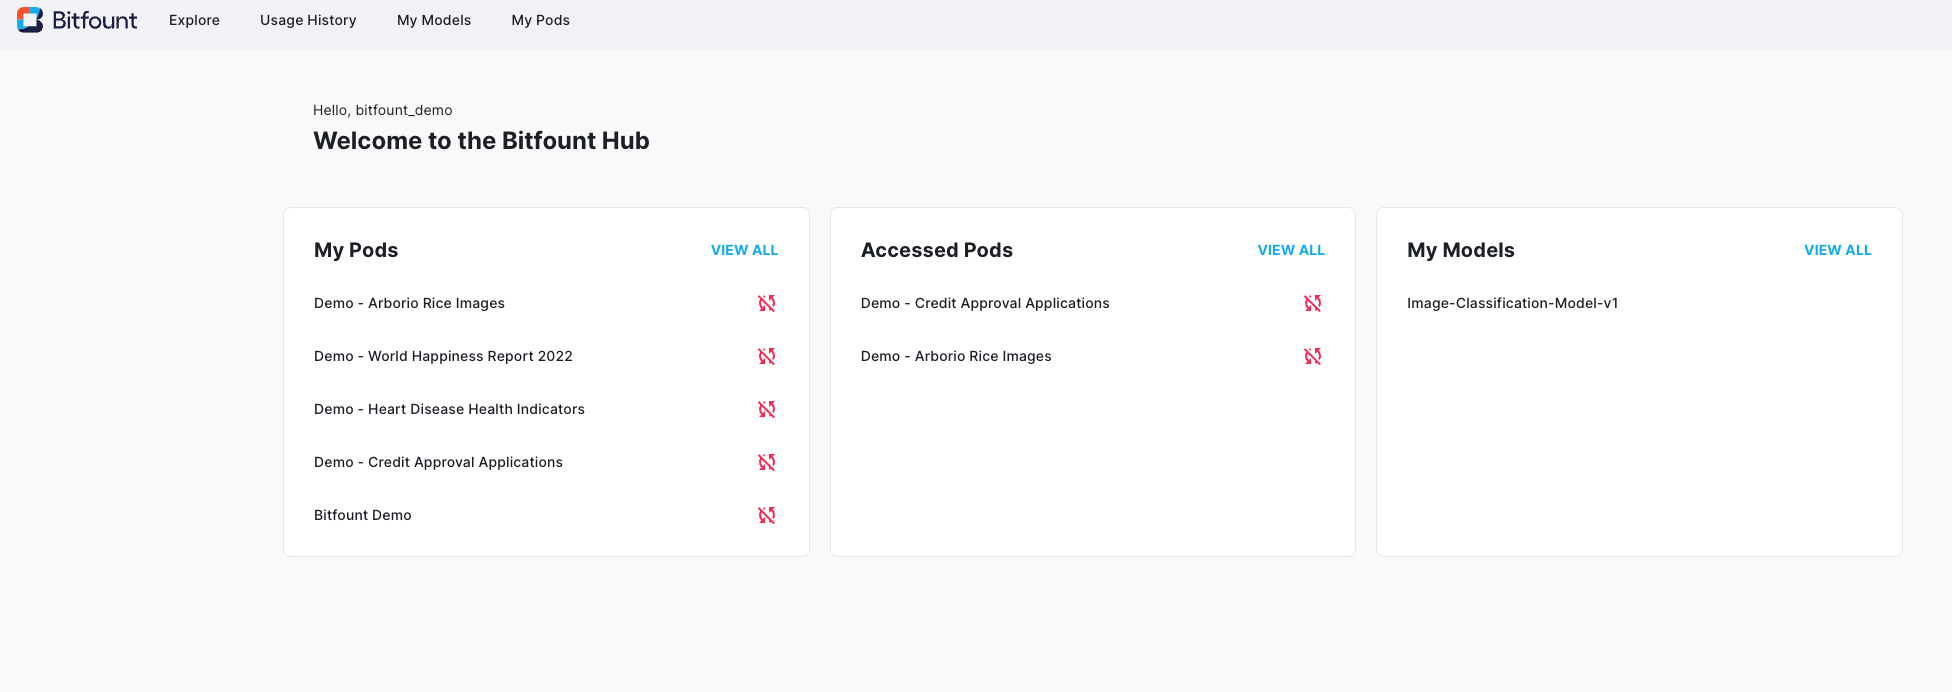
The “My Pods” and “My Models” cards provide a shortcut to sections also available in the navigation menu at the top of the page. “Accessible Pods” allows you to view permissions and metadata for the Pods to which you’ve been granted access.
The navigation menu at the top of the Dashboard consists of four sections:
- Explore - A full catalogue of your permissioned Pods.
- My Pods - A searchable list of Pods you own. Manage access and observe Pod metadata and usage history from this section.
- My Models - Enables you to upload and/or edit custom model code and save the model definition for future use with Bitfount.
- Usage History - Provides an audit log of your past actions across the Bitfount platform.
Explore
When you navigate from the Dashboard to the Explore page within Bitfount Hub, you are able to see all of the Pods available to you in catalogue form:
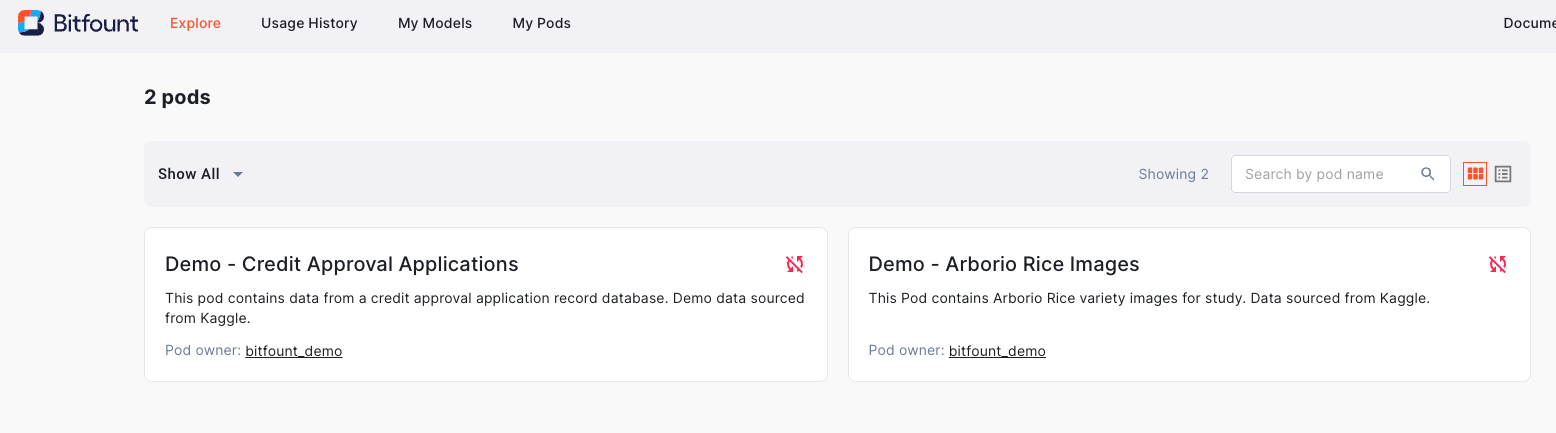
There are several ways in which you can filter and view the list to find the Pod you are looking for:
- Search for Pods by their name or owner in the search bar on the right.
- Click “Show All” on the left to filter the Pod by ‘Offline’, ‘Online’, or ‘All’ Pods.
- Toggle between Card- and List view on the right.
Once you’ve found the Pod you are looking for, click through on it to explore Pod details.
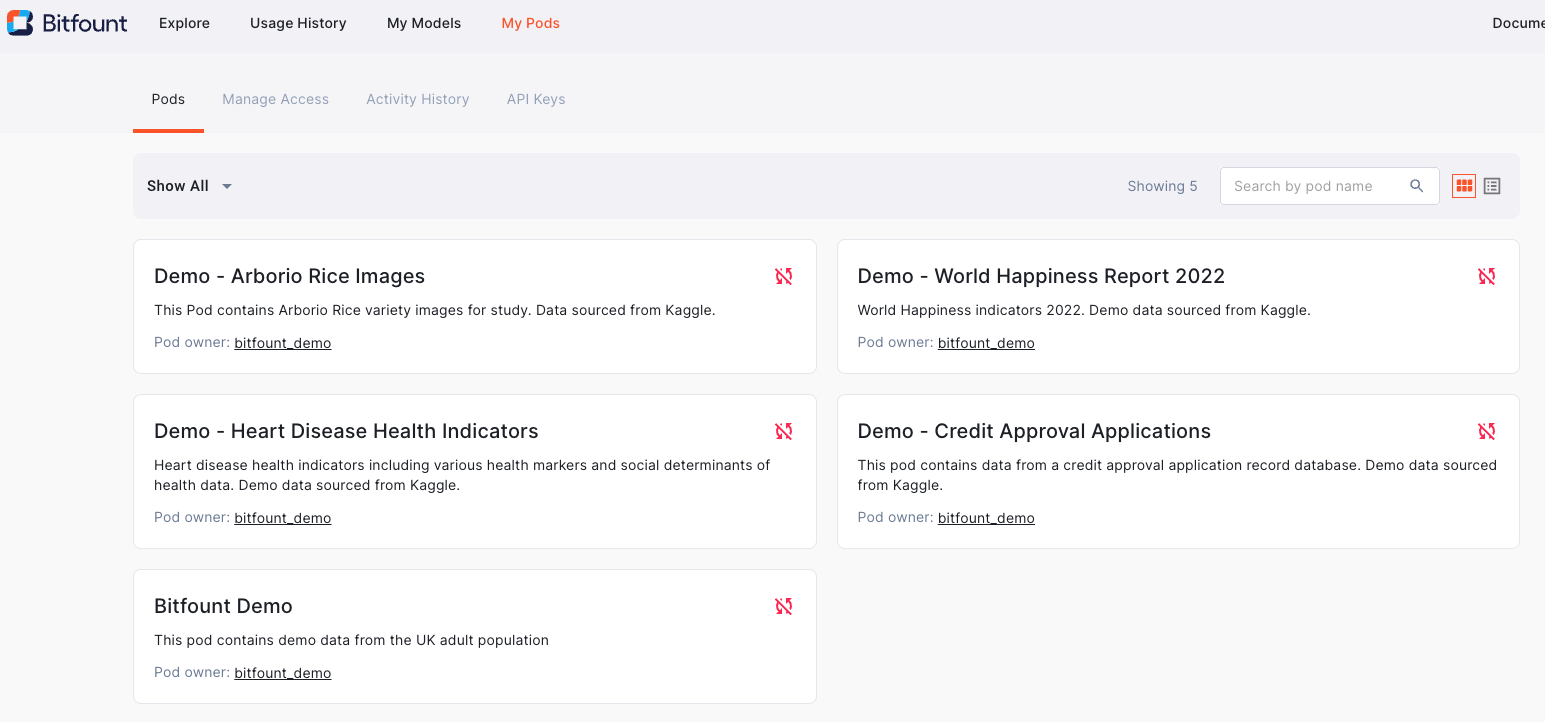
My Pods
The “My Pods” section allows you to understand Pod metadata, access, and activity history for the Pods you own.
Pod Metadata
To examine a Pod’s metadata, navigate to the “My Pods” page and search for the Pod by its name in the search bar provided. Click on its card, and you will see a Pod page like this:
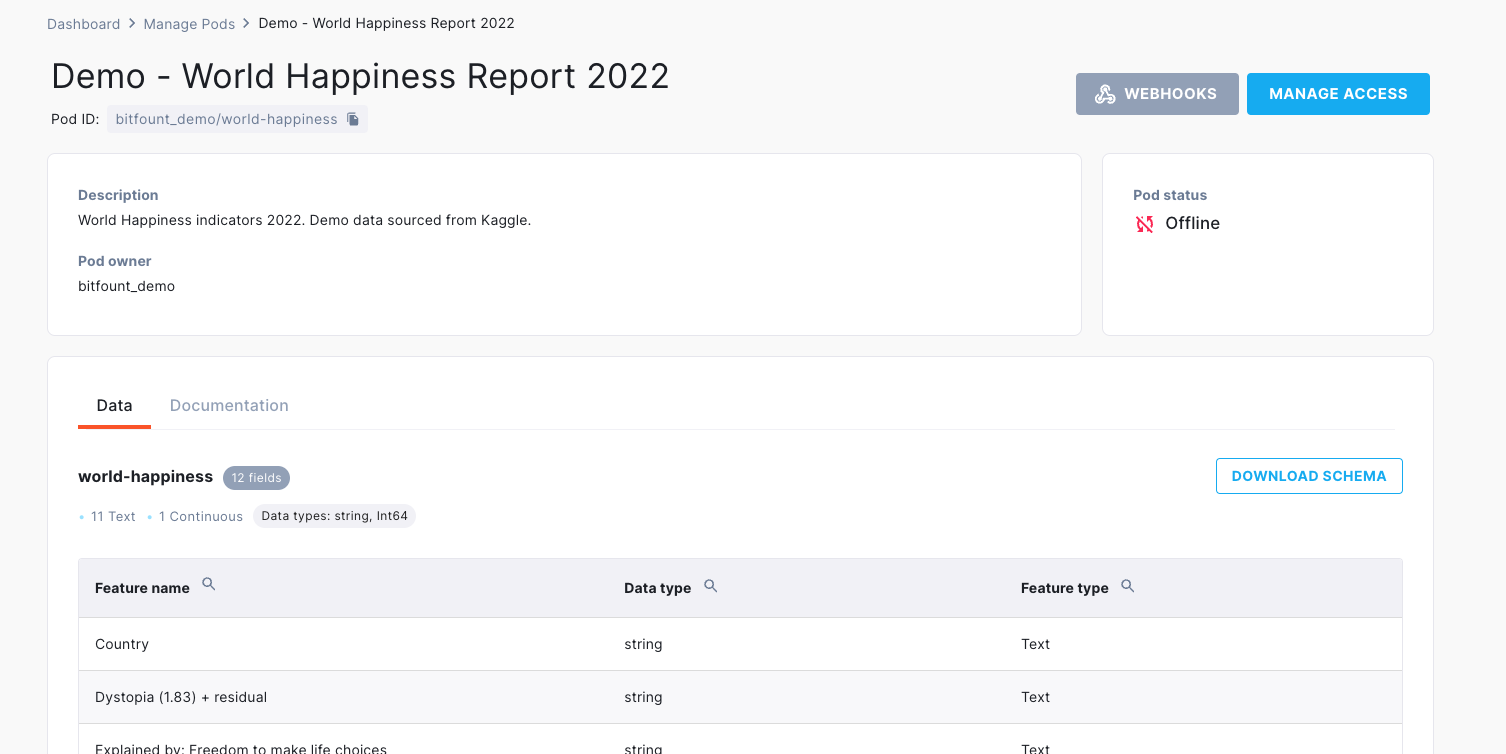
There are a few useful tools on this page:
- Pod ID:
- The Pod ID for use with the Bitfount Python API or YAML configuration files is shown underneath its display name as {username/pod_name}. This can be copied and pasted for use in querying the Python API.
- Webhooks:
- Webhooks can be used to set up automated notifications to typical channels when a Data Custodian receives an access request for a given Pod.
- Data:
- The ‘Data’ section illustrates the fields you configured when specifying the schema for the dataset associated with the Pod. This can be downloaded for use with your collaborators by clicking the “Download Schema” button.
- Documentation:
- This tab currently features the description you provided when configuring the Pod.
- Pod Status:
- Illustrates whether the Pod is online or offline. A Pod must be ‘Online’ for a Data Scientist to interact with it.
Manage Access
You can manage access to your owned Pods from the “Manage Access” tab near the top of the “My Pods” page:
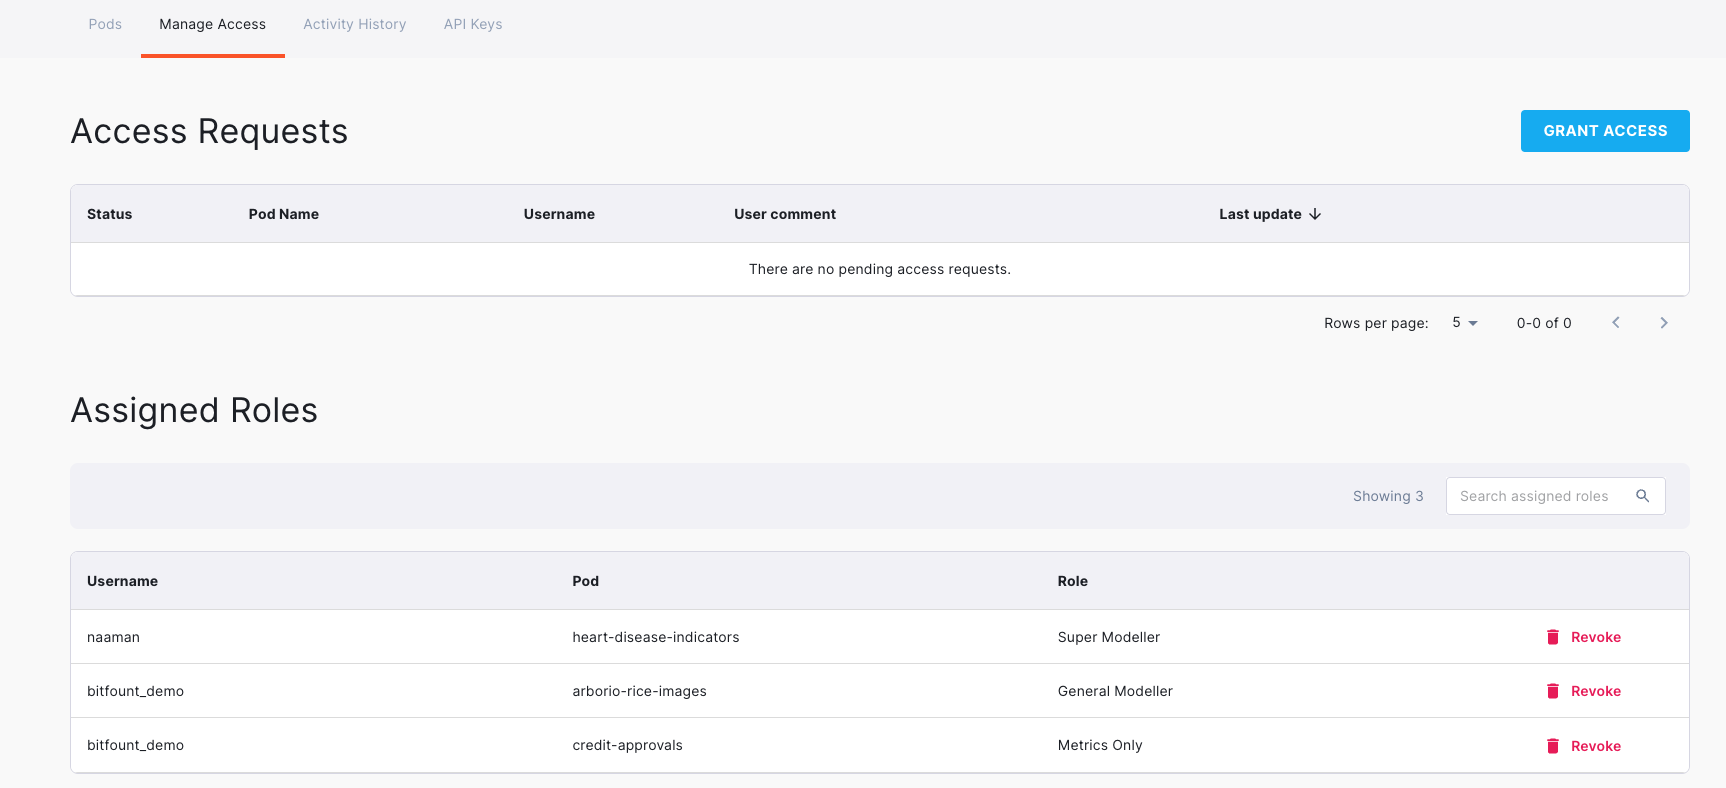
This tab also shows you access requests to Pods you own and roles you’ve assigned to your collaborators for given Pods. To learn more about granting and revoking access, see the Authorising Pods page.
Activity History
The “Activity History” tab gives you an audit trail of interactions with your owned Pods:
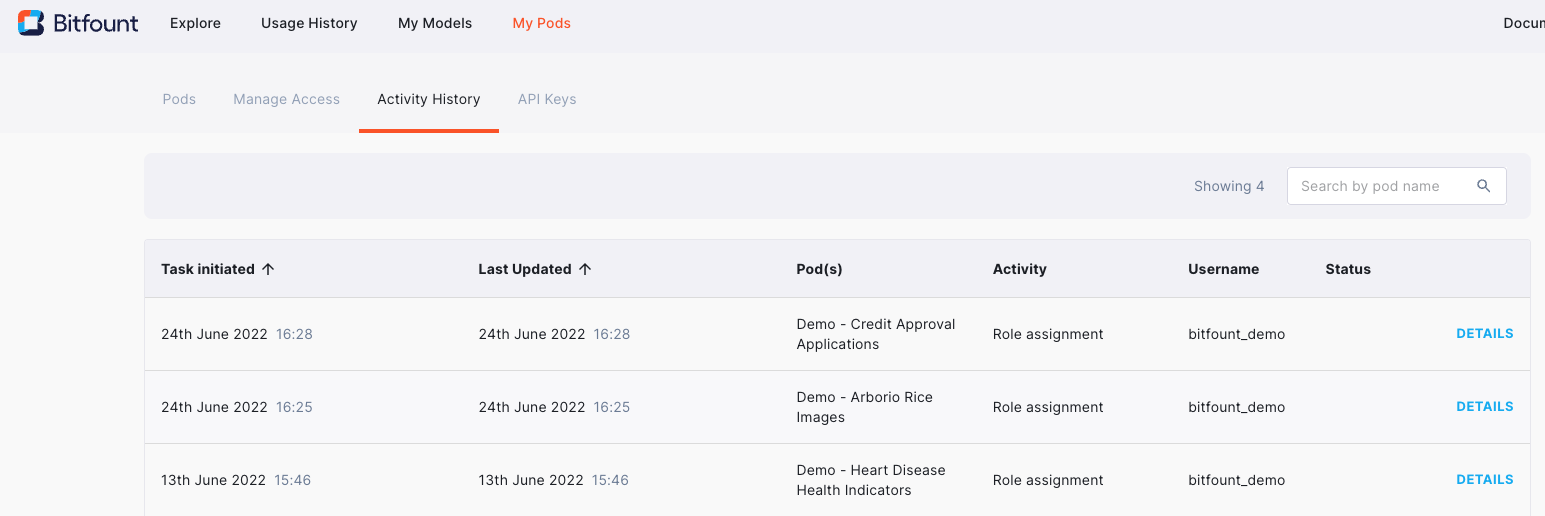
This audit log tells you which action was taken at which point in time against a given Pod and by whom. Additional details for each action are provided in the “Details” view for each action.
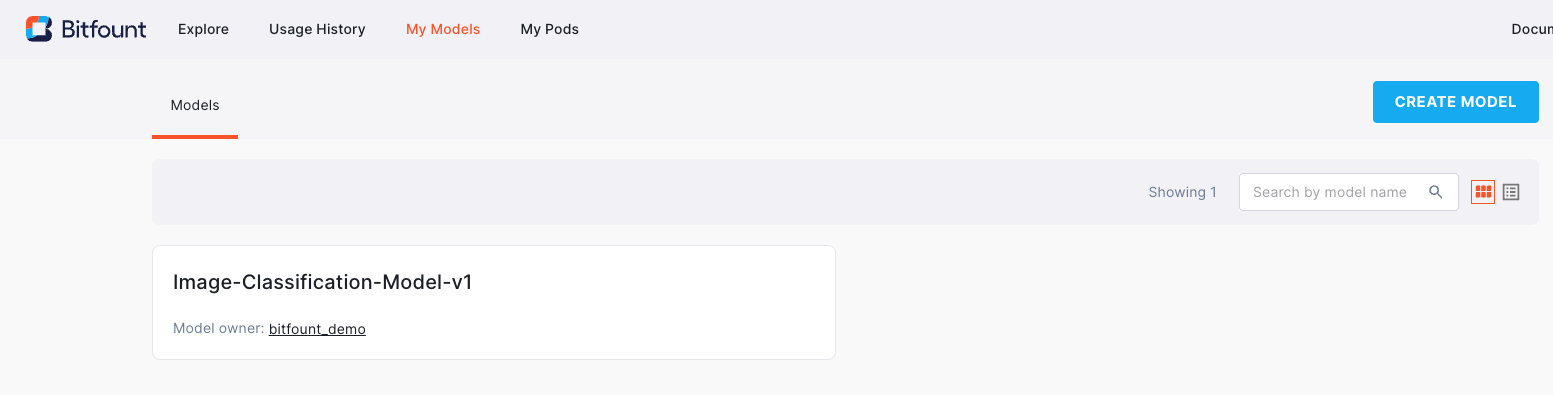
My Models
The “My Models” page allows you to save models for future use with the Bitfount platform.
Saving a Model
There are two mechanisms for saving a model via the “Create Model” button in the top right of the “My Models” page:
- Name your model such that you’ll be able to find it later in the “Model Name” box.
- If you have the model file on-hand, you can upload it by clicking the “Upload File” button and selecting the appropriate file. Bitfount supports the upload of .py files for saving a model.
- If you’d prefer to copy and paste your model for saving, Bitfount provides a text function which allows you to do so in the black box. Just copy and paste your model code as you would any other text.
- When you’re ready, click the “Create Model” button at the bottom of the page. If you make a mistake or no longer wish to save your model, click the “Discard Changes” button at the bottom of the page.
Managing Saved Models
Once a model is saved, it can be edited, downloaded or deleted as desired.
- Editing: Find the model you wish to edit by searching the “My Models” page in the search box provided and clicking the model’s card. Make any desired changes to the model within the black text box and click “Save Changes” at the bottom of the page.
- Downloading: Navigate to the desired model’s card, scroll to the bottom of the page, and click the “Download” button to download a .py file of your model.
- Deleting: If you are sure you wish to delete your model, navigate to the desired model’s card, and click the “Delete Model” button in the top right corner of the page. You will be prompted to confirm you’d like to delete the model.
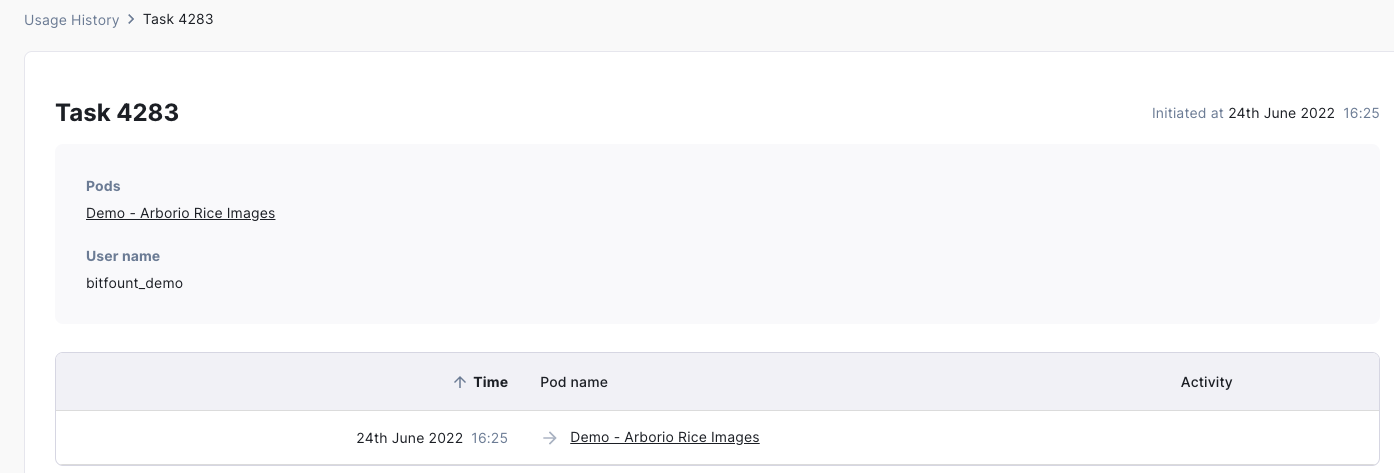
Usage History
When you navigate from the Dashboard to the Usage page within Bitfount Hub, you are able to see an audit log of your past interactions with Pods permissioned to you by collaborators.
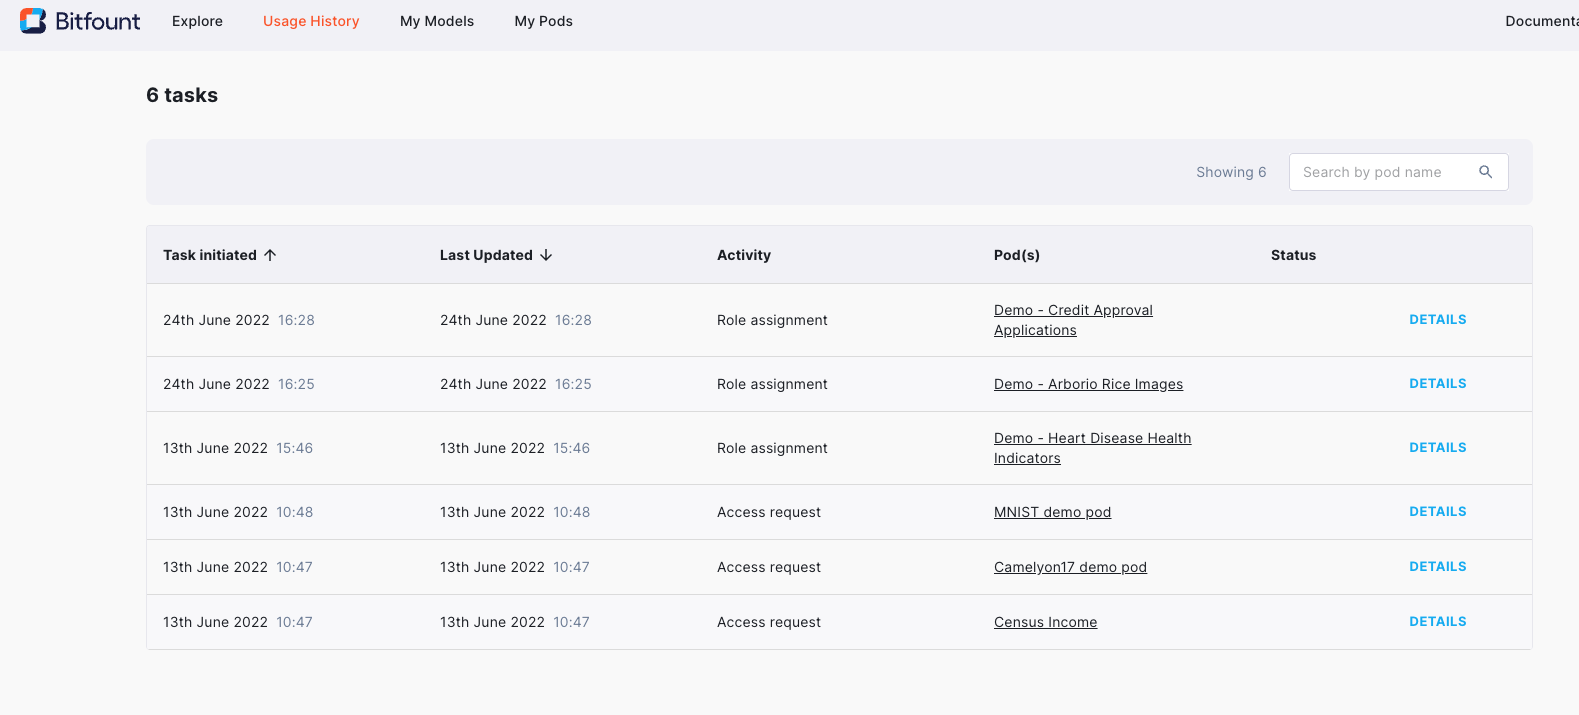
Usage History: Audit log of how you’ve interacted with Pods to which you’ve been given access.
Usage history is typically used to re-trace your steps in the event you wish to remember when you performed a task on a given Pod.
Clicking the “Details” button for a given record will take you to a page providing more details about the task for troubleshooting or reporting purposes:
Have feedback about Bitfount Hub? We love customer feedback and would love to hear from you!